

QGIS, an open-source Geographic Information System (GIS), is constantly evolving with a plethora of plugins that expand its capabilities. Among these, specialized and customized plugins such as Mapflow have been developed, advancing QGIS’s automatic digitizing process.
Mapflow is a QGIS plugin designed to meet the complex demands of autonomous digitization. This plugin provides a sophisticated set of tools and features designed to speed up the conversion of raster data into exact vector geometries. While QGIS has tools for digitization and raster-to-vector conversion, Mapflow distinguishes itself by adding additional automation and customization possibilities.
Automatic digitizing, at its core, is the conversion of raster-based information, such as satellite images or scanned maps, into vectorized representations such as points, lines, and polygons. This conversion process is critical in a variety of industries, including cartography, urban planning, and environmental studies. Mapflow allows users to speed up and optimize digitization of features from aerials, minimizing manual labor while retaining accuracy and reliability.
Mapflow has a personalized approach to automation. To efficiently read raster data, the plugin uses algorithms and intelligent pattern recognition techniques. Mapflow identifies and generates vector geometries by analyzing image values, edge recognition, and feature extraction, reducing the need for lengthy manual input. Furthermore, Mapflow incorporates validation and refining functions in addition to automated operations. Users can inspect and change the produced vectors within QGIS after digitization to ensure precision and completeness. This iterative technique, which combines automation with manual intervention when needed, increases the dependability of the digitized output.
This tutorial uses geospatial techniques to outline how to add OpenStreetMap data as a base map and automatically digitize topographic features like roads, agricultural fields, and buildings.
Creating a new project and adding the OpenStreet map tiles
QGIS is an open-source mapping software that can be freely accessed. QGIS is available for Windows, MacOS, Linux, and BSD operating systems.
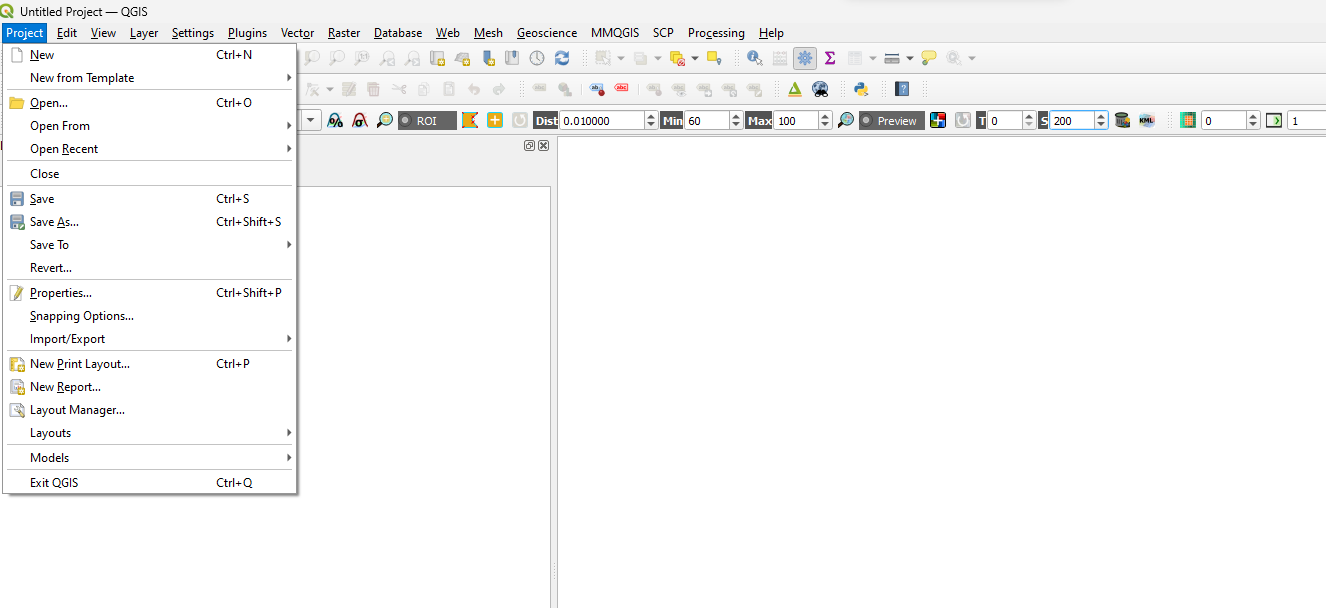
- Select Project from the menubar.
- Select New to create a new project.
- Use the Save command to save the project. Define project’s name and location.
To add OpenStreetMap as a base layer in QGIS:
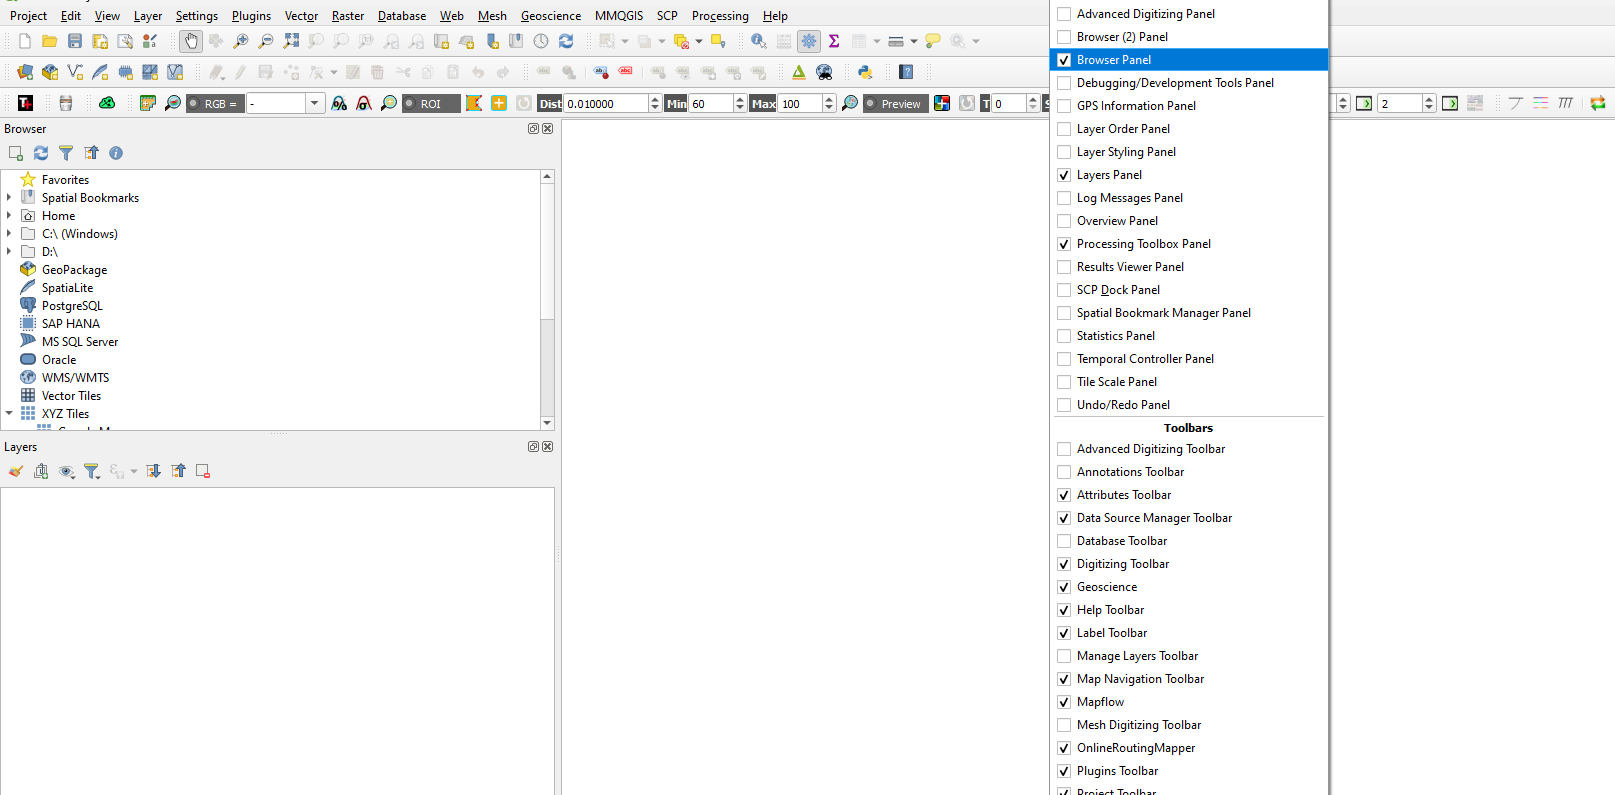
- Ensure that the Browser panel is enabled by right-clicking any aspect of the icon toolbars.
- Check the Browser panel.
- Once enabled, right-click on “XYZ tiles” from the Browser panel and select “New connection.”
- Set Name to “OpenStreet Map.
- Set URL to https://a.tile.openstreetmap.org/{z}/{x}/{y}.png.
- Click Ok.
For more information on how to add basemaps (Google maps, Google satellite, Google satellite hybrid, and global terrain) as tiles, reference this resource: How to add a Google Map/Terrain/Satellite Layer in QGIS 3.

- Ensure that “Browser 2” toolbox is enabled by right-clicking on the menubar and checking the Browser 2 box.
- From the Browser 2 window, double-click XYZ tiles and add Openstreet map to the map canvas.
Adding the Mapflow plugin into QGIS.
The Mapflow plugin enables QGIS users to extract buildings, fields, roads, and forests with heights from high-resolution imagery using AI models. This auto-digitization feature from high-resolution imagery saves tons of time. To retrieved the Mapflow plugin, visit the Mapflow — QGIS Python Plugins Repository. To import the plugin into QGIS for use:
- Select “Manage and Install Plugins” from the plugins tab on the menu bar.
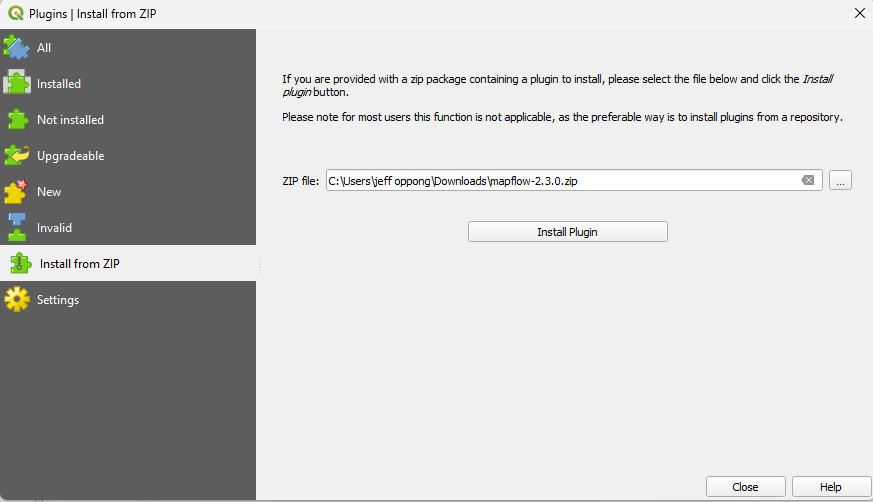
- From the plugins window, select “Install from Zip.”
- Click the three dots by the Zip file search space to toggle to the location of the Mapflow plugin file.
- Click Install plugin.
Automatically digitizing roads, fields, and buildings from imagery.
To automatically digitize features in QGIS using the Mapflow plugin, define an Area of Interest (AOI) by:
- Select “Create Layer” from the Layer tab.
- Select “New shapefile layer.”
- Set File name to desired name and location of the AOI.
- Set Geometry type to polygon.
- Click OK.
- Highlight the new created shapefile from the Layers panel by selecting.
- Click on the pencil-like icon from the array of icons on the Digitizing toolbox. Ensure that the Digitizing toolbox is enabled.
- Toggle to the location of interest from the QGIS map canvas and define AOI.
After the AOI has been defined, use the steps outlined to auto-digitize some topographic features in AOI:
- Select the Mapflow plugin, which appears as a red-rainbow like icon.
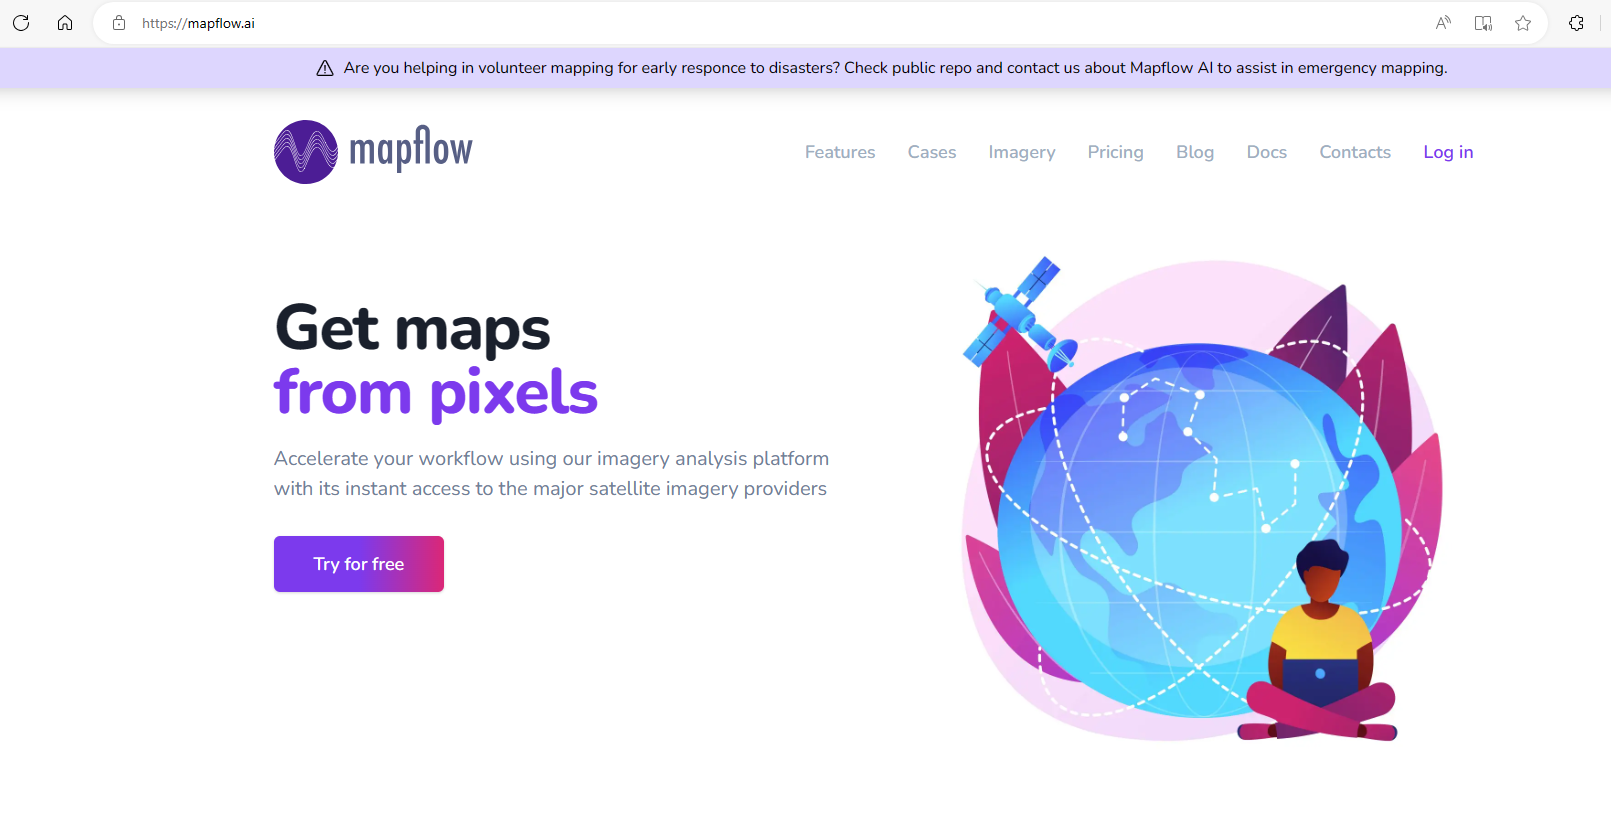
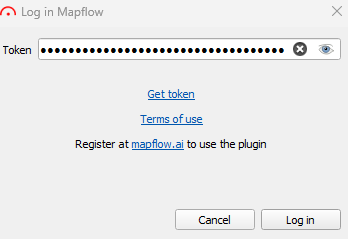
- Click “Register at mapflow.ai.”
- The Mapflow webpage opens. Select “Try for free” for a limited use of the plugin.
- Select Sign up.
- Provide personal details and select Signup.
- A link is sent to the provided email address for activation and further configuration.
- From the API tab, select “Reset API” to generate an API code for use in QGIS.
- Copy the code and input as the login details.
- Click Login.
- Set Name to desired name.
- Set Area to digitized AOI.
Alternatively, plus sign option to define an AOI according to the map’s display extent.
- Set Data source to Mapbox.
- Define AI model as buildings.
- Click Start processing.
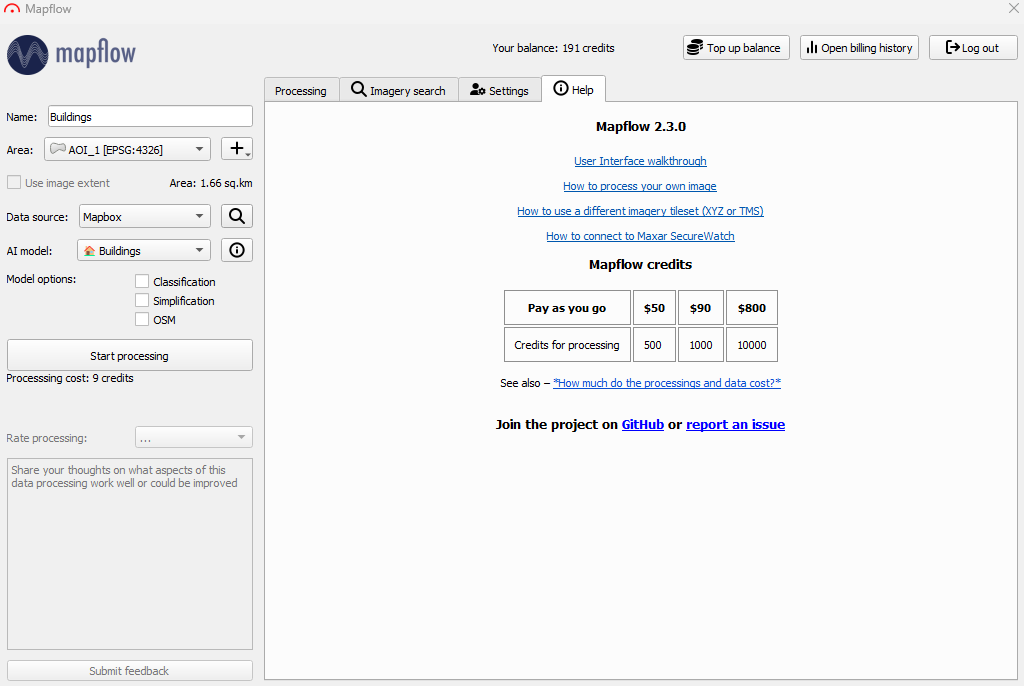
Keep in mind that although free credits are offered for the digitization process after sign-up, only a 25 square kilometer area can be processed at a time with the free version of Mapflow.
To auto-digitize agricultural fields, forests, roads, and construction sites, set the AI model accordingly.
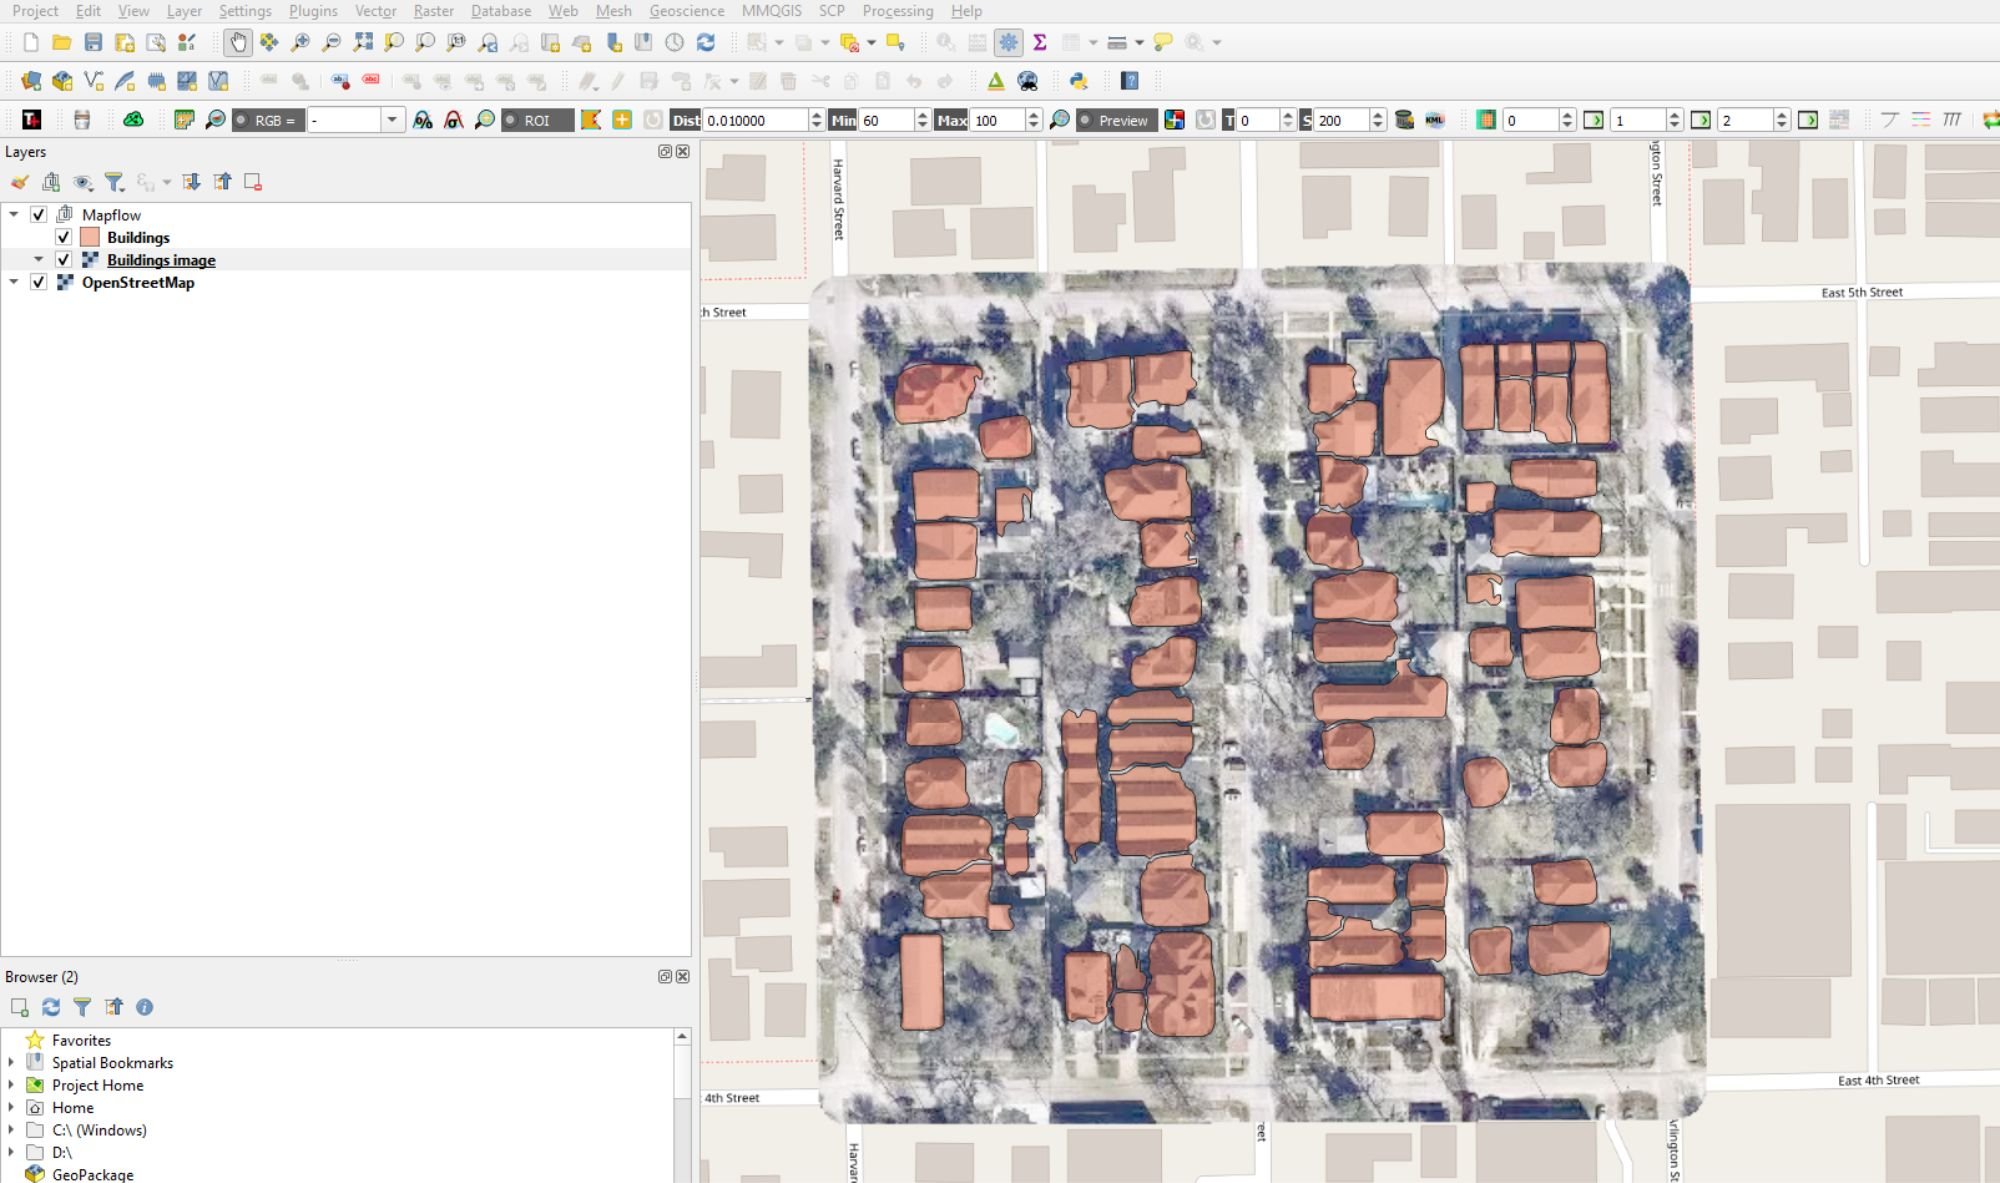
A sample of what can be automatically digitized from OpenStreetMap imagery:
More QGIS tutorials
Fonte : National Geographic


")


")


